DIY DE LA CHEMISE BRODEE
Happy wednesday kids!
Aren’t we getting our regular posting rhythm back ? I have desires and ides of DIY all over the place: deco (ambitious), mode (that you’ll like), convenient and summery (that I SO want to show you right now), and for dudes as well (coming really soon)... Anyway I’m going at full speed. Today is a little DIY post and a good deal at the same time, I am in favor of holding multiple offices... I was telling you I am lucky, and the «blogger» status (I really prefer «girl with a website», I can’t wrap my head around it...) gives me a privilieged status for crazy experiences and clothing insanities... The private sale Sandro with Arlettie (that I recently talked to you about) started yesterday and during the weekend I was allowed to sneak into the showroom to choose an item to make a DIY.
And now you’re thinking, the girl is completely crazy, she can choose any item and she picks a shirt... Well yes, I can’t stop thinking that if I choose a sublime item, I risk ruining it with a DIY. Ruining is a little bit strong but a DIY on a strong and beautiful item can be really tricky and to succeed it’s surgical-like. And also, on top of not being sure of succeeding, you’d have laugh at me for it being too hard to achieve.
Let me explain: for me there are different types of DIY. The DIY with no risk-taking: I’m going to H&M, I buy a white t-shirt, I cut it, sew it, tear it, nail it whatever... If it’s a fail, I don’t care because I’d spent 4,99€, I’d wear it once for the picture and it’d end up at the bottom of my dresser, I might give it for a private sale hoping that someone like it... Do you see what I mean ?
And there is the ambitious DIY, the one in which you invest money (not too much though) and time (not like 10 minutes in the corner of your table, in a rush to see it done). Because from me to you, the difference between a successful DIY and a failed one is the material and the meticulousness you use to make it. So I’m not going to debate: the more expensive things aren’t necessarily of the best quality but be sensitive to the material, touch and caress things. Forget polyester and prefer a nice poplin 100% cotton.
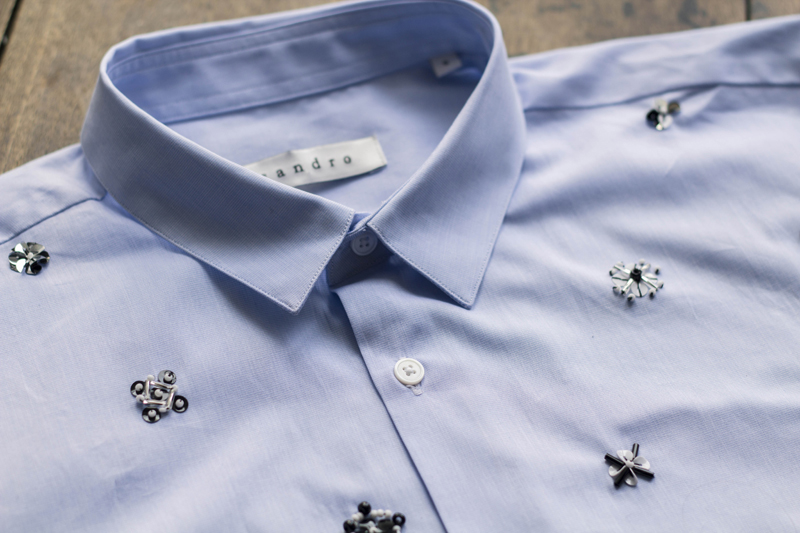
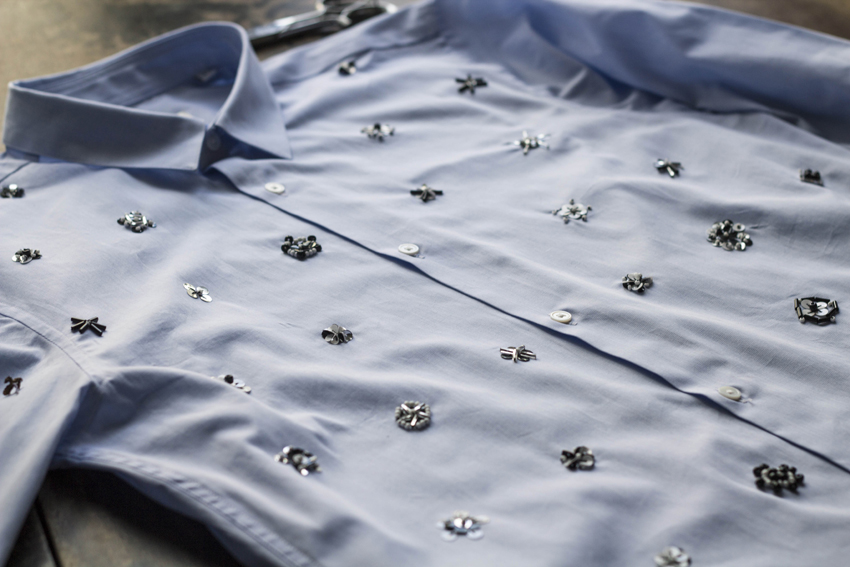
Bottom line, I’d rather put a little more money into raw material so in the end I really want to wear my DIY... And I can tell you that it’s the case of this shirt...
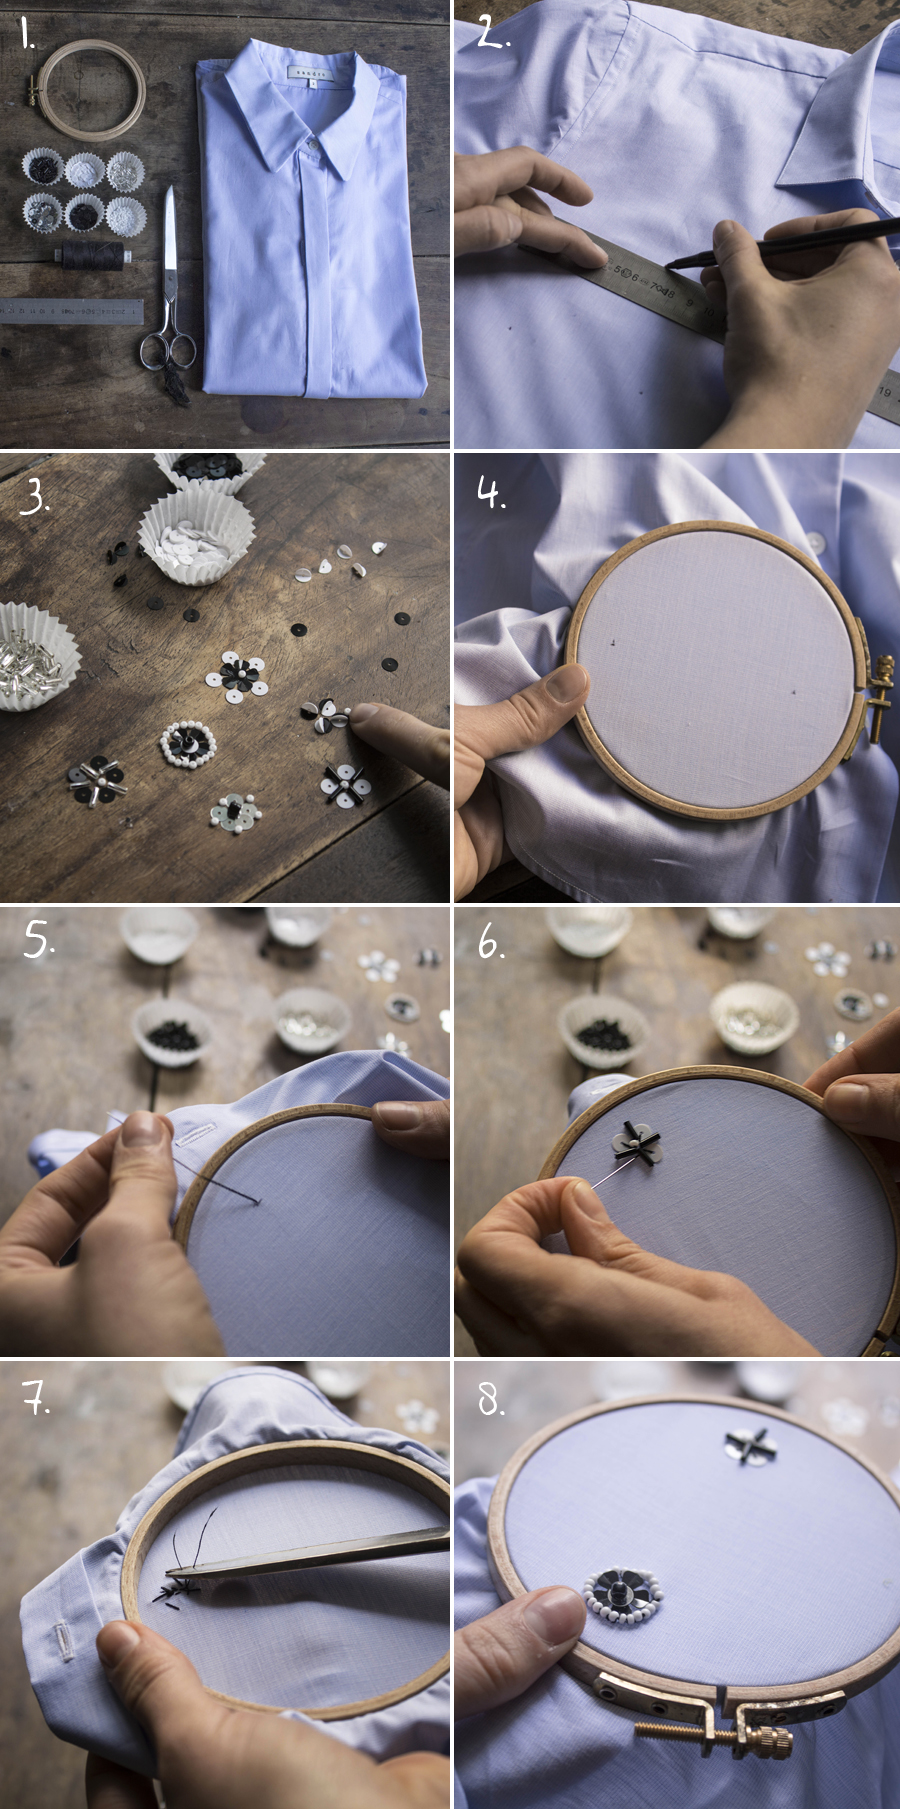
To make this DIY you will need:
- a high quality shirt,
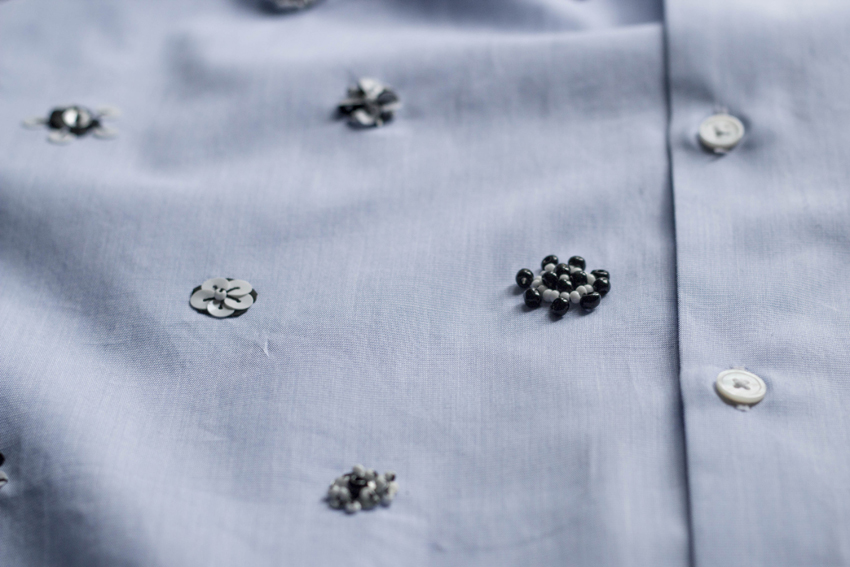
- Flat sequins, white, black, silver and even flower shaped,
- Little rocaille beads, white and black,
- Rocaille tubes, silver and black,
- A embroidery frame,
- Thread and a very fine embroidery needle,
- A ruler and scissors,
You will see, it’s not that complicated! To start with, iron you shirt, it’s important so you can clearly see. Take a ruler and a pencil and point out the locations of your future embroideries. Here it’s in staggered rows every 7 cm, and starting from the second line (7 cm higher) I started to mark the locations at 3,5 cm from the edge... Until the top fig. 2. On the table or in a plate, draw the pattern that you’re about to embroider, enjoy it and have fun, bend the sequins, mix them, make flowers etc... Fig. 3. You can of course image that patterns symmetrically answer to each other from one side of the shirt to the other, or if you’re inspired they can all be different! Install your embroidery frame fig. 4, make a knot at the end of you thread and start embroider fig. 5 & 6. Once your pattern is finished, turn you shirt and make several knots on top of each other (you’re never too safe!) fig. 7. And start these steps as many time as necessary, you’ll see that it’s very relaxing... And TA-DA!
Kisses ! And don’t forget to transpose... This DIY on a flower shirt, with multicolors sequins etc etc etc. HAVE FUN!