


DIY MACRAMÉ SHELVES[:]

Happy Wednesday!
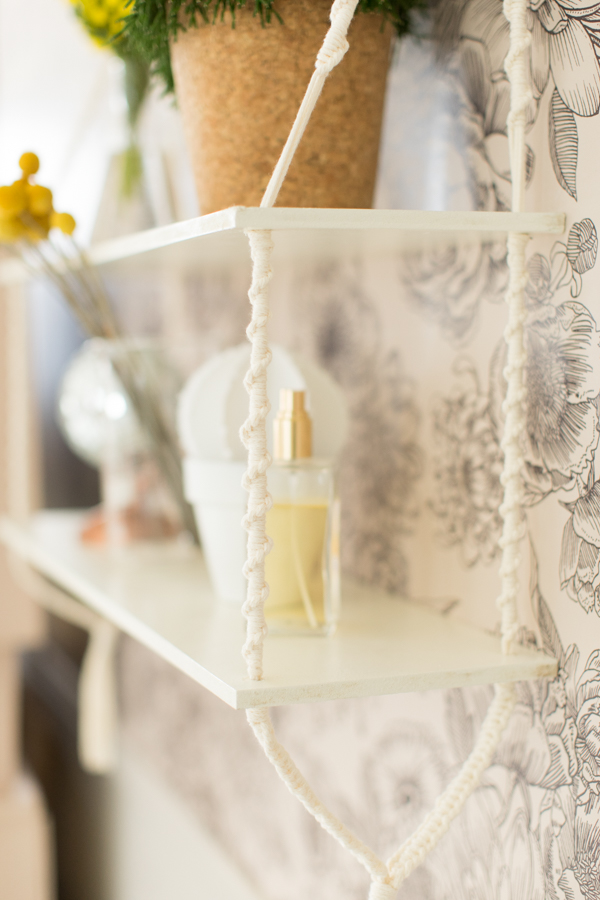
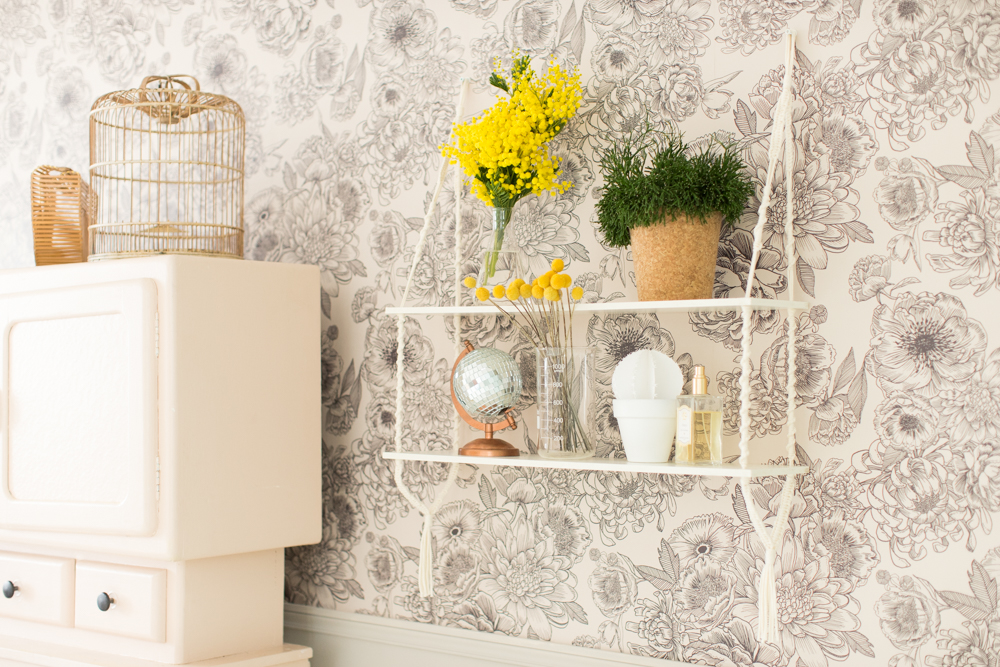
Let’s start off this week by getting our fingers busy making these DIY macramé shelves! You might have noticed during the Lemonade Shop that we’ve fallen in love with macramé, thanks to Phildar, who sells this pretty chalk colored cord. We’ve watched so many DIY videos to get the technique down pat! Macramé is really easy, you’ll see. The possibilities are endless once you learn some basic knots! We had some macramé workshops in October but we wanted to go a little bit farther today by making this macramé shelf! I promise that with some patience, you can make an amazing project!
For this DIY you’ll need:
- 2 x 10m of ecru colored cord (from Phildar)
- Binder clips, that’ll make things easier
- A pair of scissors
- Scotch tape
- Two wood boards, 60 x 20 cm,
- A drill
- Paint
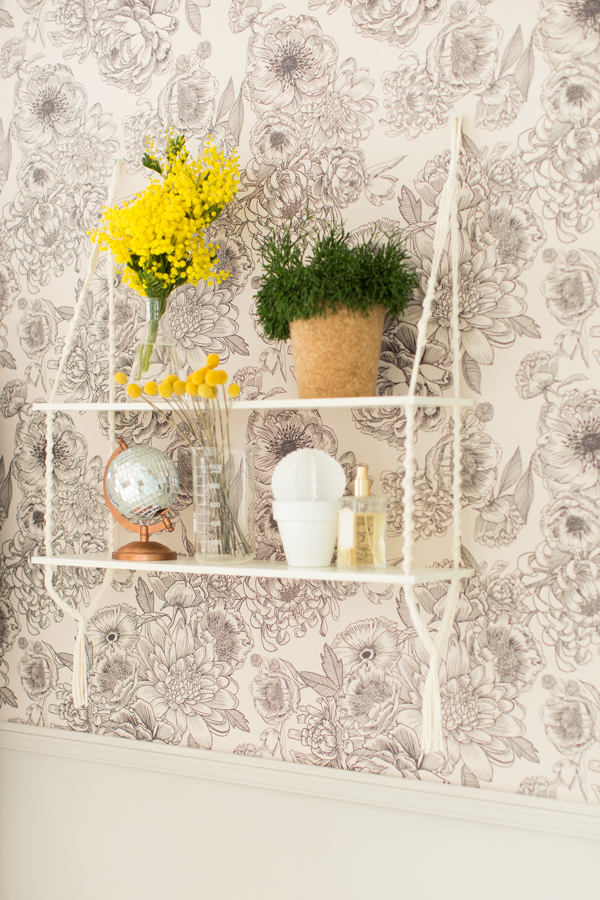
Keep making knots, whatever kind you want, and slide the second shelf on the same way! To finish it off, you can make knots for about 10 cm, then tie them together using a joint knot and cut off the extra thread! And ta-da!
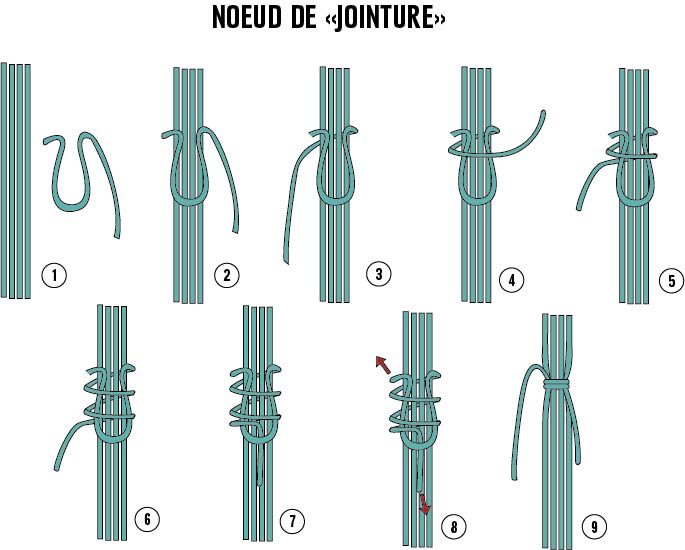
It’s easy to make a “joint” knot. Using a small piece of cord, make a loop that you’ll put around the strands. Pass the right end of the loop behind the strands and bring it back on top. Do this as many times as you want. To finish it off, put the end through the first loop, take the second end of the loop, and pull!
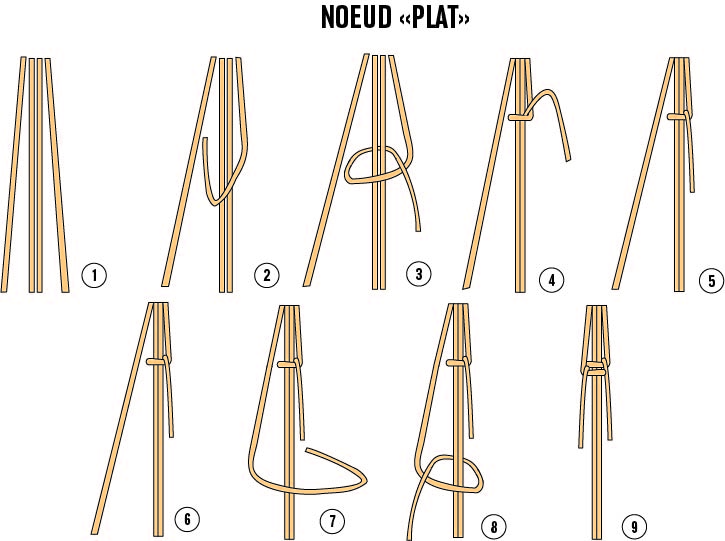
To make the flat knot: separate the left and right strands. Pass the right strand up around the two central strands and then behind and under, through the loop and tighten. Do this again, using the left strand. There you have it, a flat knot. Just alternate left and right!

The “twisted” knot is the easiest one: Pass the right (or left, whichever you want) strand up and over the three others, then behind, through the loop and tighten. Keep doing this with the same strand and same knot. It’ll go around and around on it’s own, like magic!
 I hope you have a wonderful week, see you soon with other new projects! Thank you, Phildar, for helping us with our macramé adventures!
Musique : Santoré - "THAT BALL"
Translated by Whitney Bolin[:]
I hope you have a wonderful week, see you soon with other new projects! Thank you, Phildar, for helping us with our macramé adventures!
Musique : Santoré - "THAT BALL"
Translated by Whitney Bolin[:]