


DIY PERFECTO
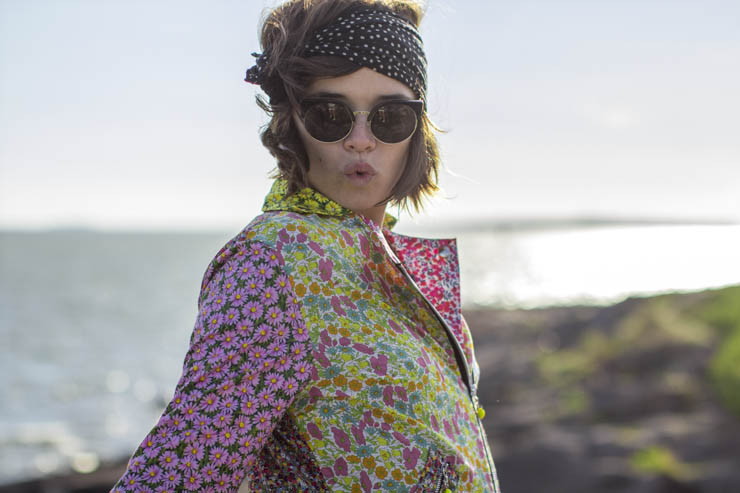
My little cats!
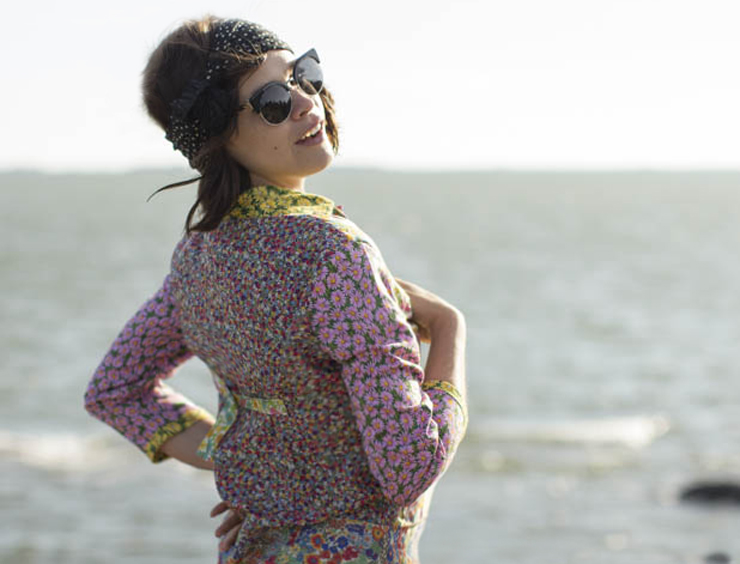
Yes it's DIY Wednesday ! Here we go again we keep the rhythm going, I really want to get my fill of clothes lately! Until I made this post, it's been months since I didn't use my sewing machine! How I had missed it, what was I thinking about ?! And what a satisfaction once my work was done... I had forgotten the feeling of happiness that Makes my day... In order to tell you the story of this perfecto, you need to remember that a little bit more than a year ago I did 10 perfecto that I sold on Etsy with really crazy fabrics... Then I got dozens of emails asking me whether I was going to do the DIY of the perfectos, where did I find the template of mine etc... Firstly I didn't really want to post the DIY because it was long to make and also it was the beginning between you and me and I didn't want to scare you with such an ambitious sewing DIY. Ever since, there was this video with my sewing basics... So let's go and refresh your neurons before you start, then a few weeks ago I found this picture of a perfecto by Christopher Shannon and I think hell yeah I want one for myself as well... Here is the story, take your sewing machine out of the closet and of course look further than your computer screen and imagine your own polka-dots perfecto or in upholstery fabric etc... Have fun!
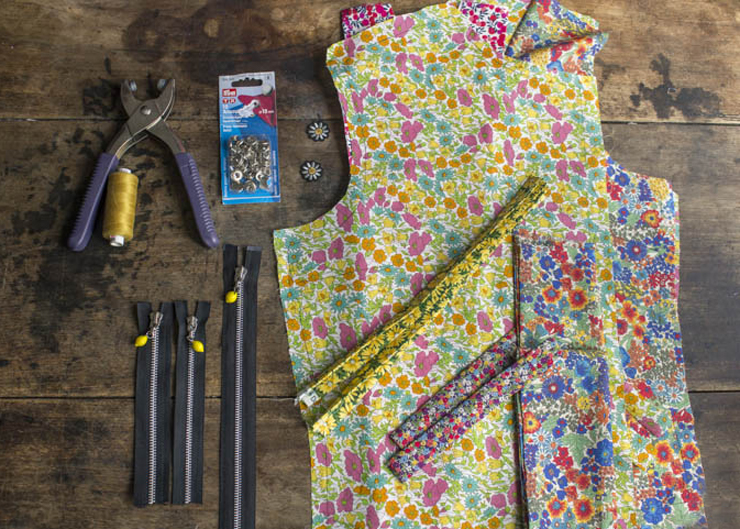
To make this DIY, you will need:
- To download the pattern HERE, I made it with A4 paper sheets so your job is to print, assemble and cut them!
- - 3 zippers: one of 45 cm and two of 15 cm,
- - A sewing machine, obviously,
- - Your iron, warm and ready,
- - Iron-on interfacing to rigidify the perf's facing,
- - Press-studs and pliers to fix them,
- - A little slide buckle,
- - Fabric of course, about 1,5 m for a 1,4 m width,
- - And a little bit of patience, take your time...
`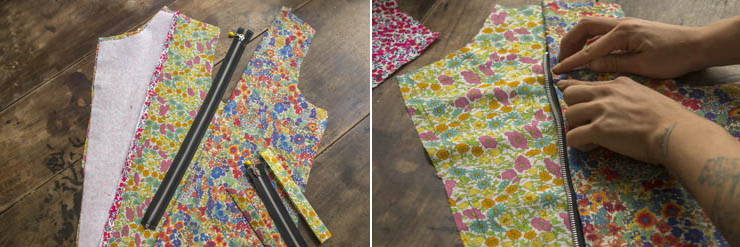
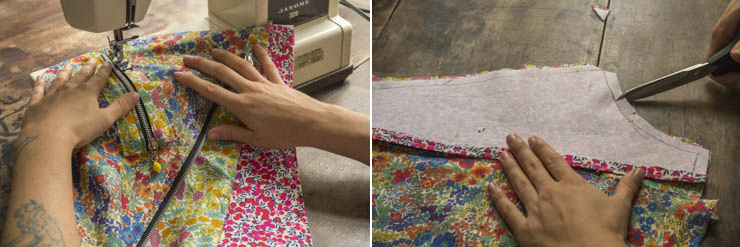
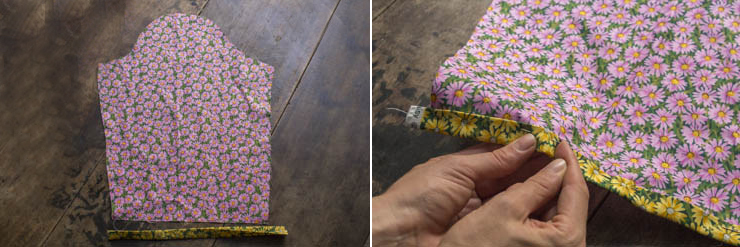
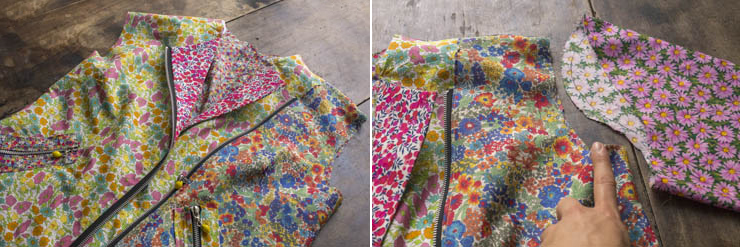
We will start with the right side. Of course before anything starts you have to transfer the pattern onto your fabric (on the INSIDE) and cut it by leaving 1cm around your outline (the sewing margin)! Take all the necessary parts for the right side (see pattern) and put the interfacing on the facing. Put the two 'right' sides A + B (of the fabric) of the right side (of the perfecto) on top of each other and make a basic hem on part B (use your iron to help you). It's here that you are going to sew the first part of your zipper, the "male" part the one with the pull. Put the zipper 5 cm above the bottom of the "right" side (of the fabric), pin, sew with your machine and iron.
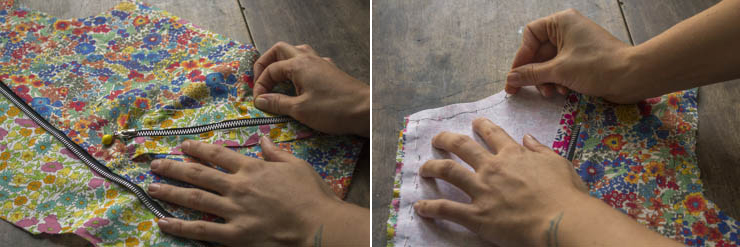
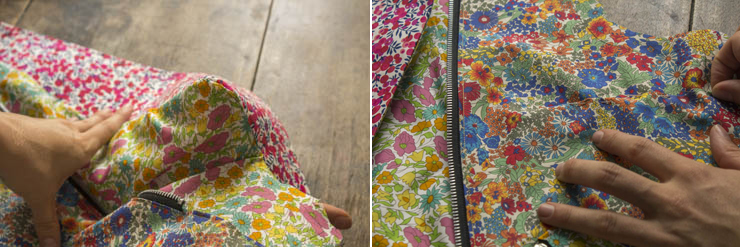
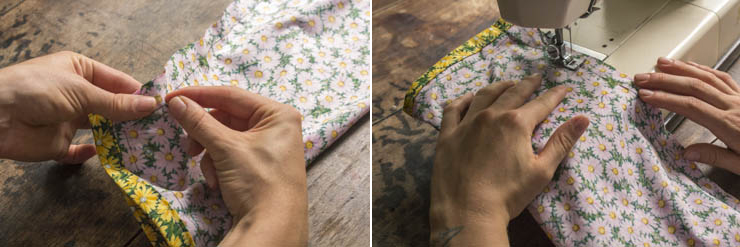
Then put your first false pocket, take two strips of fabric and carefully fold them in order not to have any raw seams (use your iron to help you). Pin the strips on the front next to the zipper to create your false pocket. Now let's get to the C facing. You have to pin the "right" side against the "right" side until the notch shown on the pattern, it is important for the rest (it's the location of the collar).
Sew the pockets and the facing that you'd have previously pinned, then clip the collar and clear the facing and front angle.
Slide and gently turn the C facing and the A front over, iron to flatten the seam. Then take pins to make the breast dart. Sew with your machine and iron. The right side of the perfecto is done...
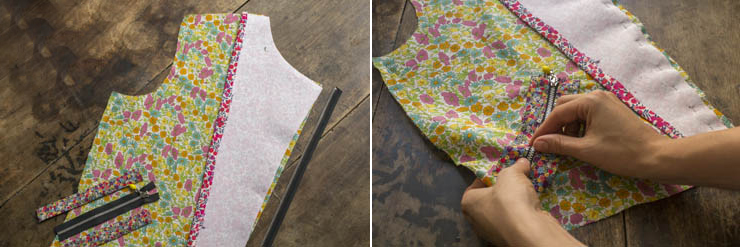
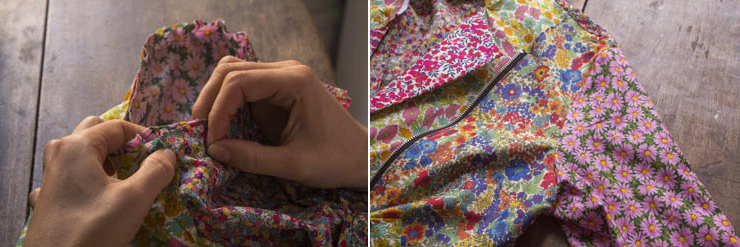
Let's get to the left side... Start to pin the left A' front and the C' facing by sandwiching the other part of the zipper, the top of the zipper must lean again the bottom of the collar as on the first picture. Pin the false pocket like on the right side of the perfecto.
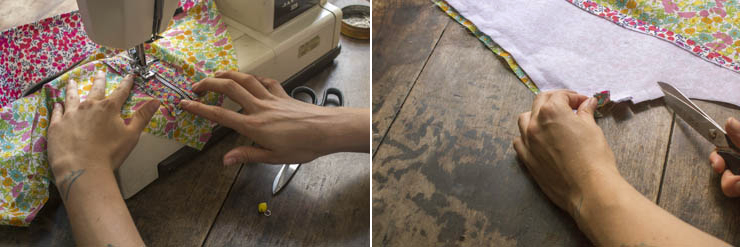
Sew the lot with the machine, clip, slide and iron just like the other side, you're starting to be real little couturières!
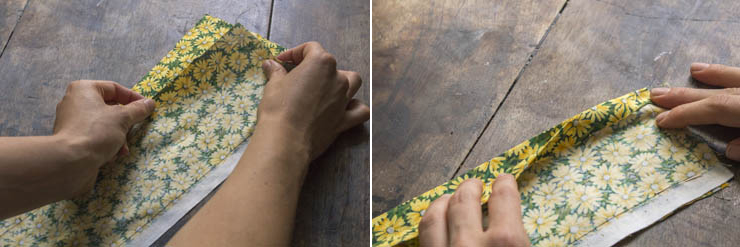
Let's get to the sleeves, it's very easy, take two strips of fabric and preform them as slanted strips, it's about making a pretty completion at the bottom of the sleeve, pin and sew with your machine.
Then pin the rest of the sleeve "right" side against "right" side in order to make a tube. I'd advise those of you that don't have any serger at home to sew a first time with a regular stitch and a second time using a zig zag stitch.
Let's now get to the back, it's very easy, first assemble both parts D and D' of the back and sew an open seam (with the help of your iron). Then pin the back darts and sew them with the machine, don't forget to iron well afterwards.
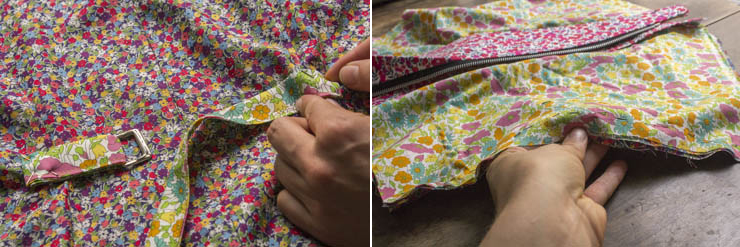
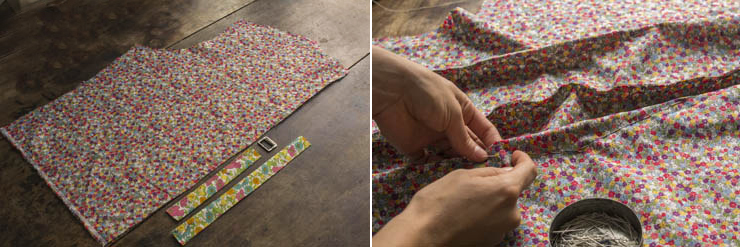
As shown on the pattern's explanations, draw two strips into the fabric that you will preform like slanted strips and sew to obtain a very clean ribbon of fabric. Put the slide buckle into the first ribbon and make a loop to prevent the buckle to ever fall. Pin this little martingale in the middle of the back or a little bit lower it's up to you to decide where you want your perf' to be taken in, rather at the waist? On the hips ? Sew it with the machine by making a cross with the seams. You now have your back, both of your front and sleeves... Start pinning together the back and the fronts, "right" side against "right" side.
Sew and double it with a zig zag stitch. Then thoroughly flatten the seams with the iron. Let's now get to the sleeves, it is starting to look like a perfecto...
Now pin the sleeves and the body of the perfecto together, if you've worked well so far the armholes' circumference will perfectly fit the sleeves. Sew ad double with a zig zag stitch, then iron... It will become an automatic reflex you'll see.
Now let's get to the collar, with your iron make a little turnover as on the picture and pin your collar "right" side against "right" side, sew it, clear the angles and slide on the "right" side.
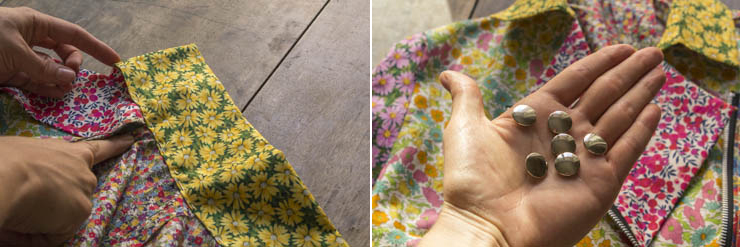
Then pin the collar on the perfecto, the notches on the pattern will work as points of reference, they match with the shoulder seams of the perfecto. Carefully sew the collar with your machine using a pin tuck . Then it's the finishing touch... The press-studs!
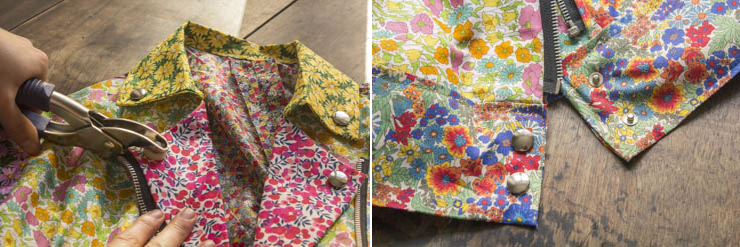
It really is easy, take an "Anorak" kit and follow the instructions and everything will be fine. I only put the "female" part (the smooth button) because here the press-studs are only decorative but feel free to put the other side. Oh and also, don't forget to sew the belt all around the bottom of your perfecto to finish your jacket (you have the instruction with the pattern's explanations!)
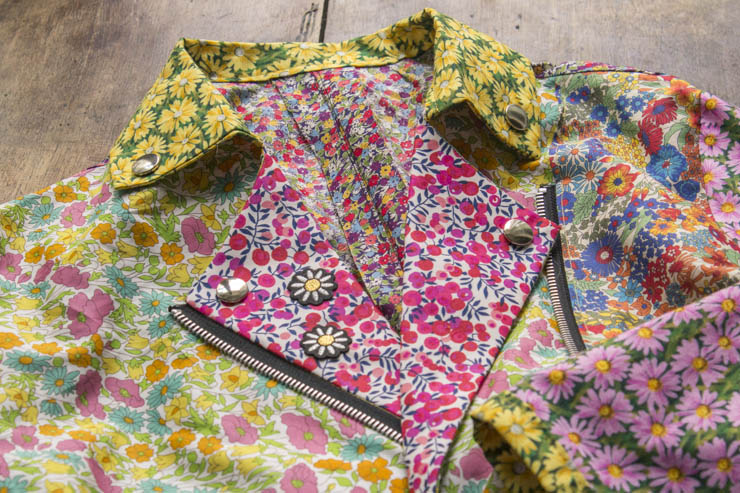
And TA-DA! The little flowers are from Macon et Lesquoy, so adorable!
[:]