


DIY Pomp(om) it up[:]

Happy wednesday my lovely cats!
I hope you’re all doing great, I first wanted to thank you for all your awesome comments under my last post about my wish cards! THANK YOU for sending me heaps of love, it is so warm and bracing!
So today it’s DIY as usual, nothing revolutionary but there is nothing better than customizing a lovey sweater… To keep yourself warm, to bring a touch of fun in your everyday life during this grey January, to become the idol of every children under 6 and so on… To be honest I fell in love with this image on Tavi's Pinterest and I kept it somewhere in my head until this day where I found the magic tool « the pompom maker » on the famous MILH ( "Make it like Huguette"... you cannot make that up…) website. It’s not a revolution as in « you put the wool and three movements later the pompom is made », nope. But it makes things quite easy and the pompom is damn perfect at the end, you just have to make the ends equal and it’s perfect. It is the time for you to get your wool out again and I am giving you a challenge, give me something to dream about and send me a picture of your realization entirely covered with pompoms… You’ll have a great surprise at the end. Je vous embrasse fort!

-Cost about 20 euros… (sweater not included)
-Time about 2 hours, yes it’s true, especially if you have the magic tool I’m about to show you…
-Difficulty « finder in the nose »…
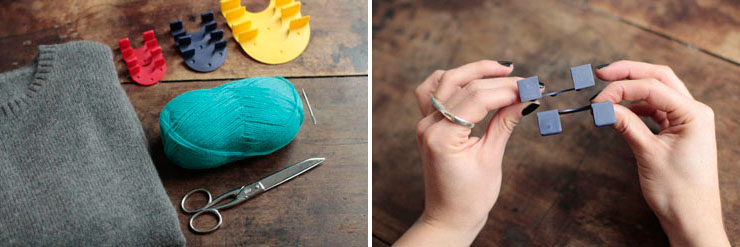
To make this DIY you will need:
-
A sweater, here it’s a Kujten.
-
Some wool (5 balls of different colors)
-
Scissors
-
A large needle
-
A set of pompom-maker tools, MILH (okay, the good old method with a round piece of card will work as well)
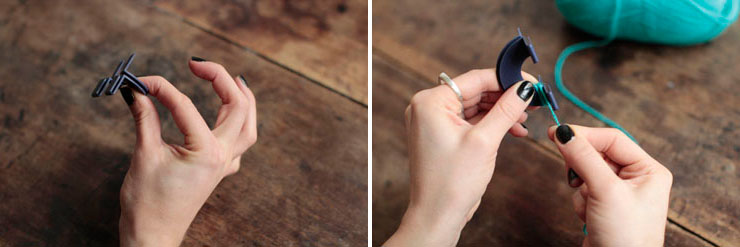
Take one of the pompom-maker tool, take the first two pieces and put them face to face.

Then start winding the wool around the half-circle. Once you think you put enough wool, after going « back and forth » a little, check that the wool is evenly winded around the half-circle.
Do the same steps with the second half-circle, then snap-together both half-circles thanks to the notches made for it (this is why this tool is magical).
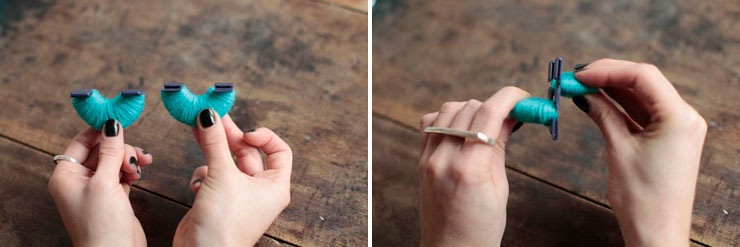
Now cut your threads by putting the tip of your scissors in the little groove made for it in order to obtain your pompom.
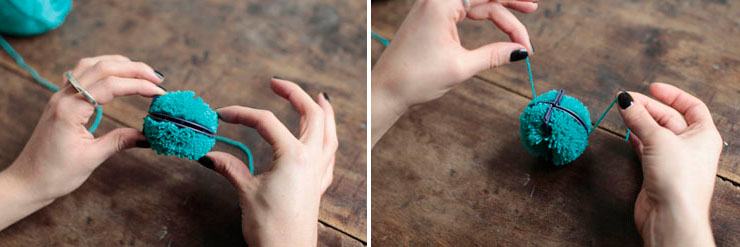
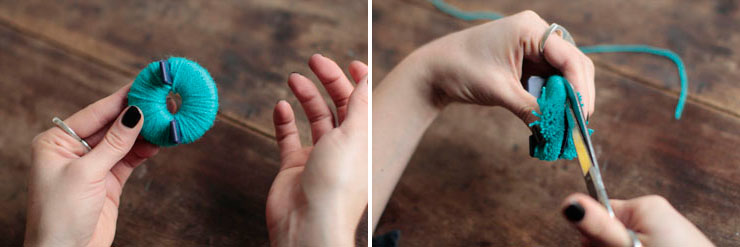
Put a thread of about 20 cm into the famous groove, go all around your pompom and fix it with a knot or two, just to be sure.
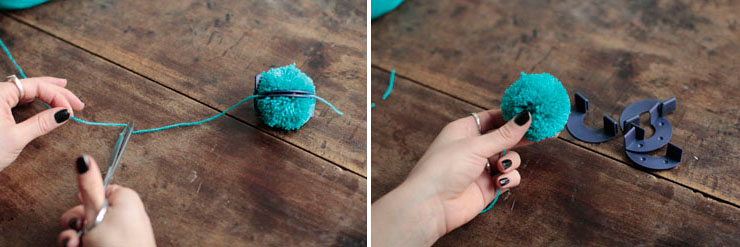
Don’t forget to keep some length before cutting, it will help you sew your pompoms on your sweater.
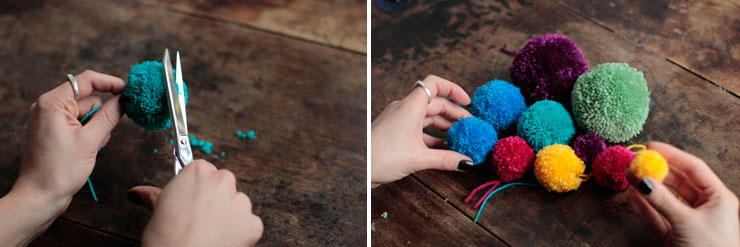
Remove the magical framework and trim your pompom with the scissors. Repeat all stamps until you have a nice family of pompoms of difference sizes and colors.
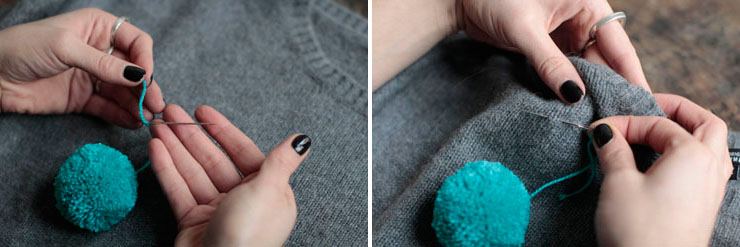
Put the end of the thread of your pompom into the eye of the needle, sew the sweater by grabbing a few stitches.
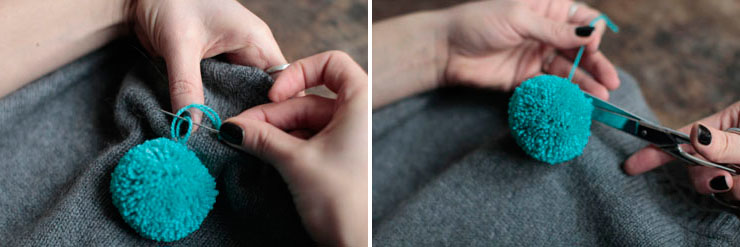
Remember to pull your thread to the fullest for the pompom to be well fixed on the sweater, and to sew it close to avoid the pompom to fall thereafter… Make several stitches and finish with a double or a triple knot, you can never be too careful.
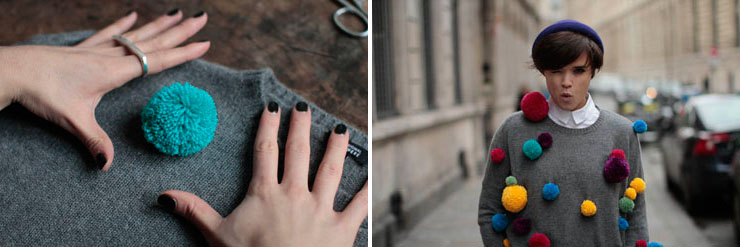
Your first pompom is now fixed you now just have to do the same with the others. And TA-DA!

I’m wearing a COS white shirt from an old collection but you can find a blouse with a similar shirt-collar there, an oversize « DIYed » Kujten sweater, yellow mustard pants from Asos, love heels by Sézane, a little H&M hat but you will find one alike here.
[:]