


QUICK MIMOSA EMBROIDERY DIY[:]
 Happy Saturday everyone!
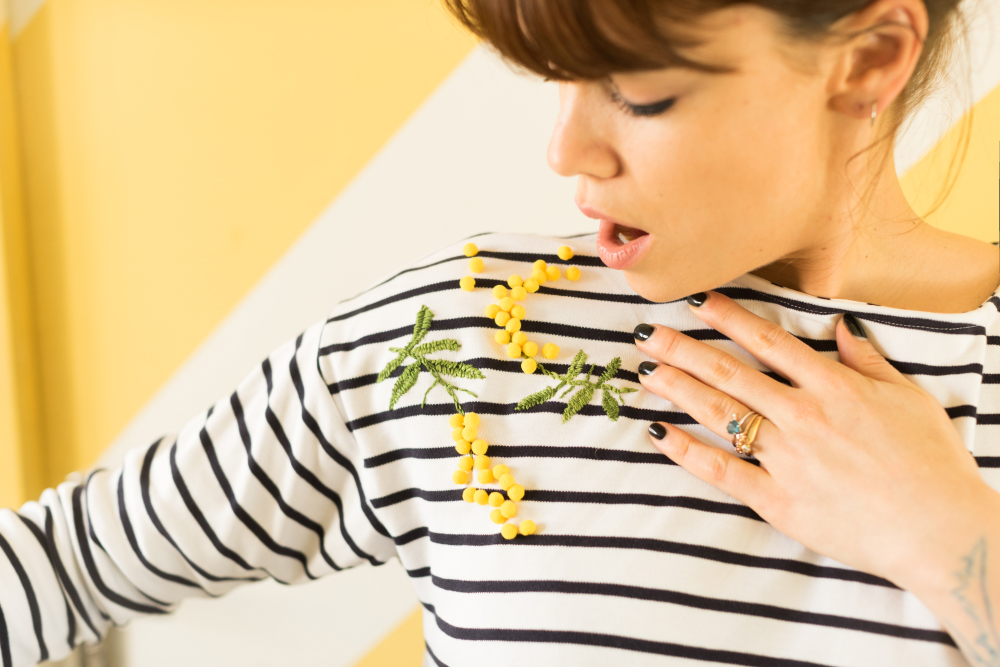
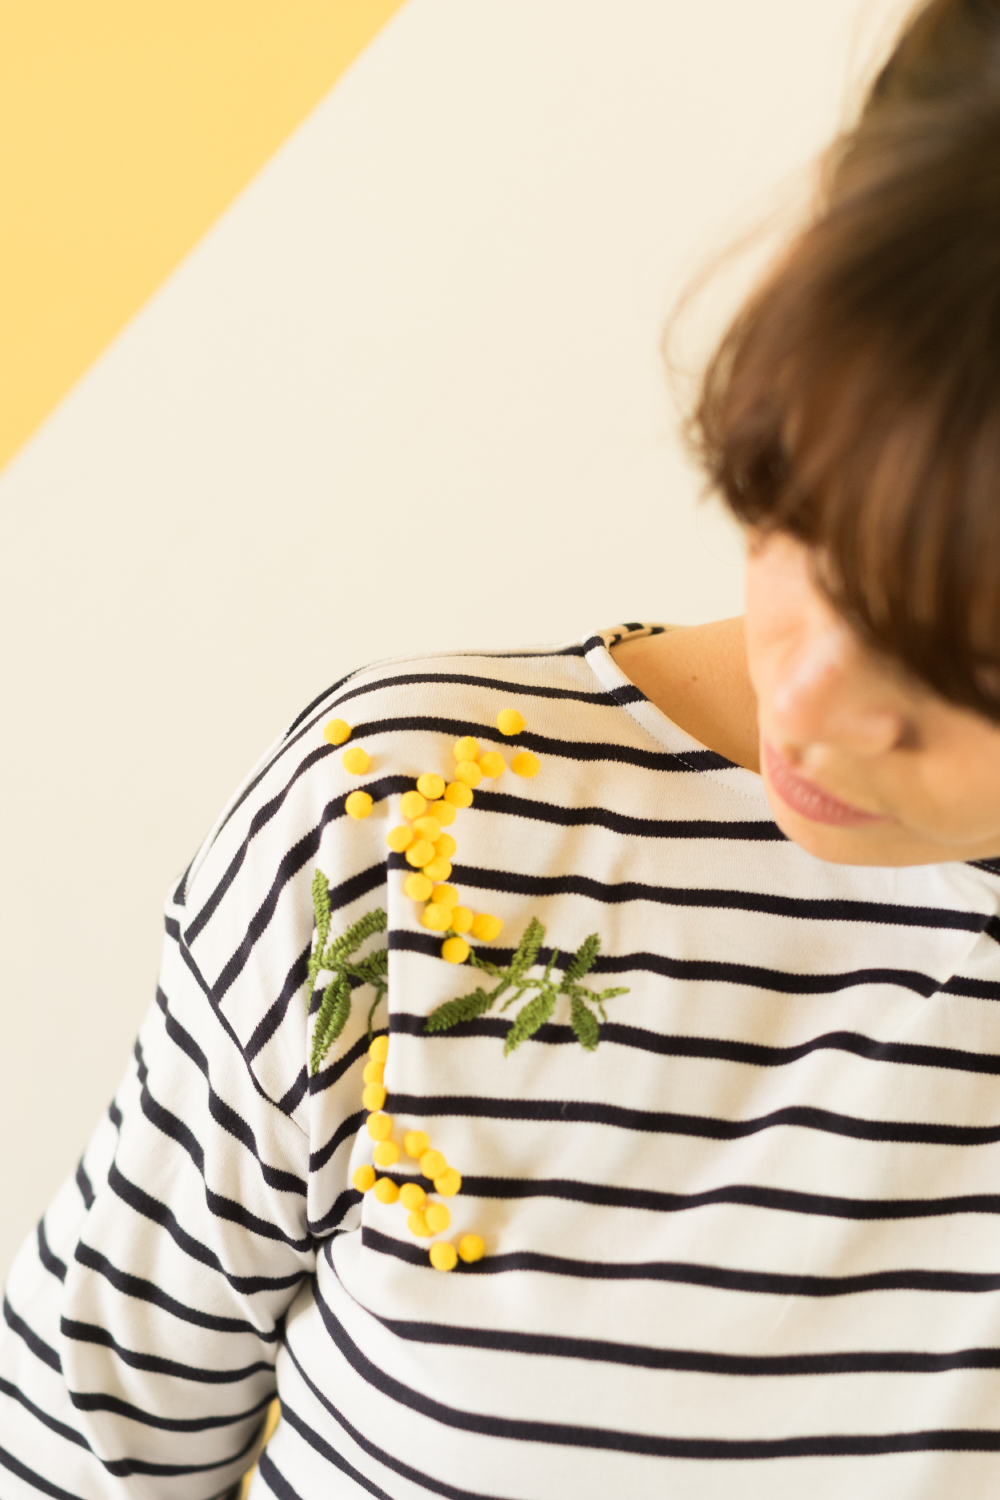
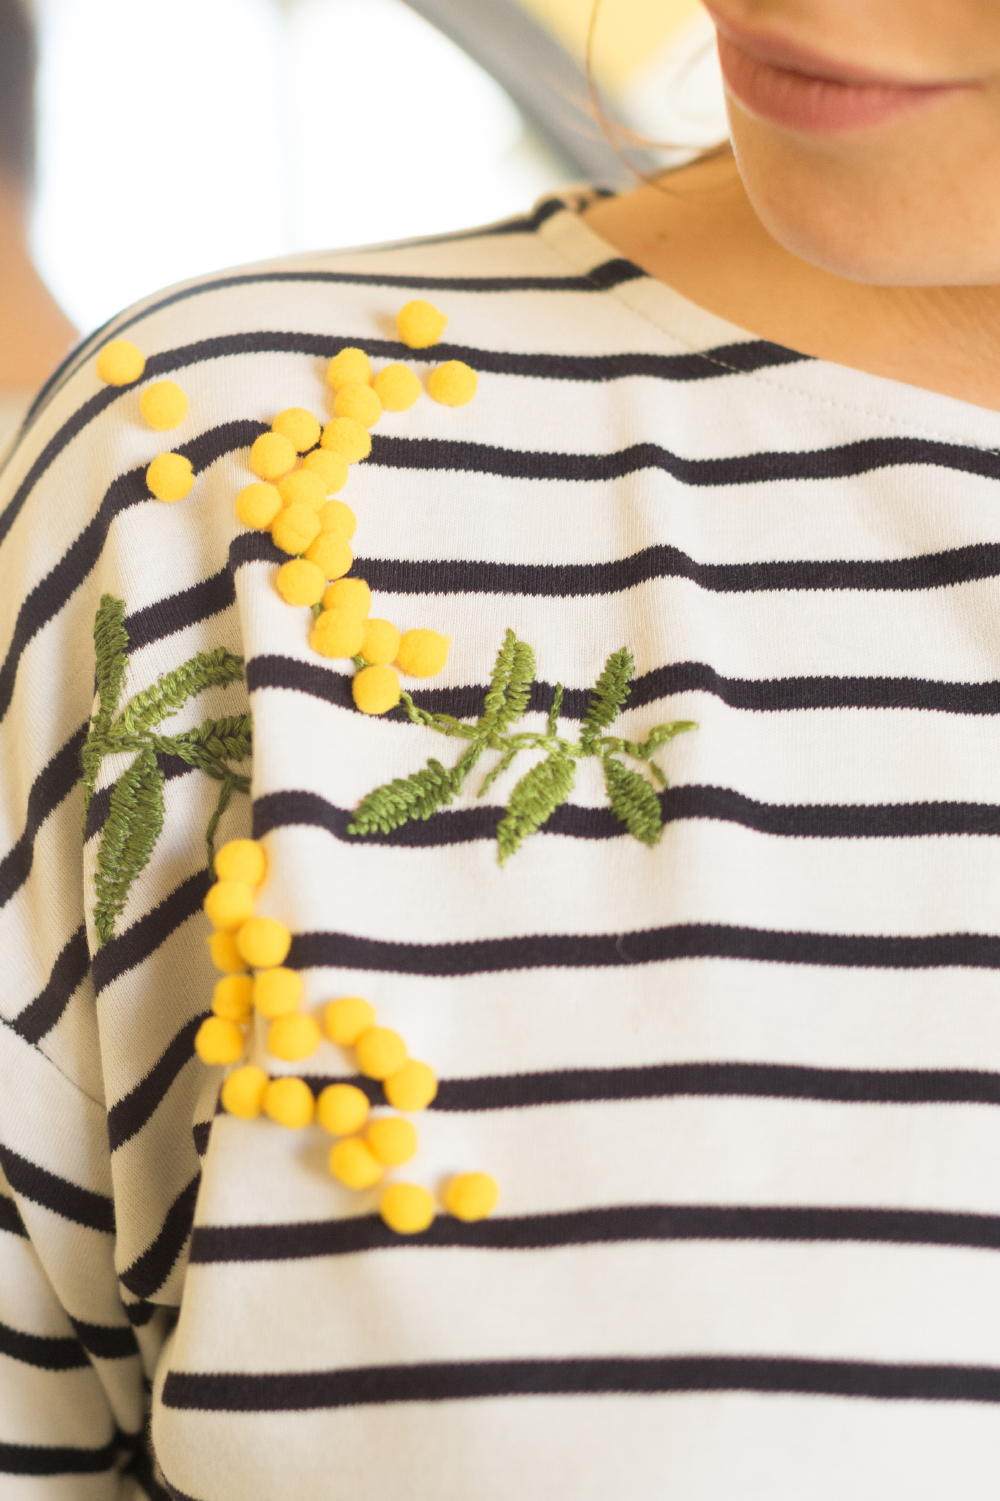
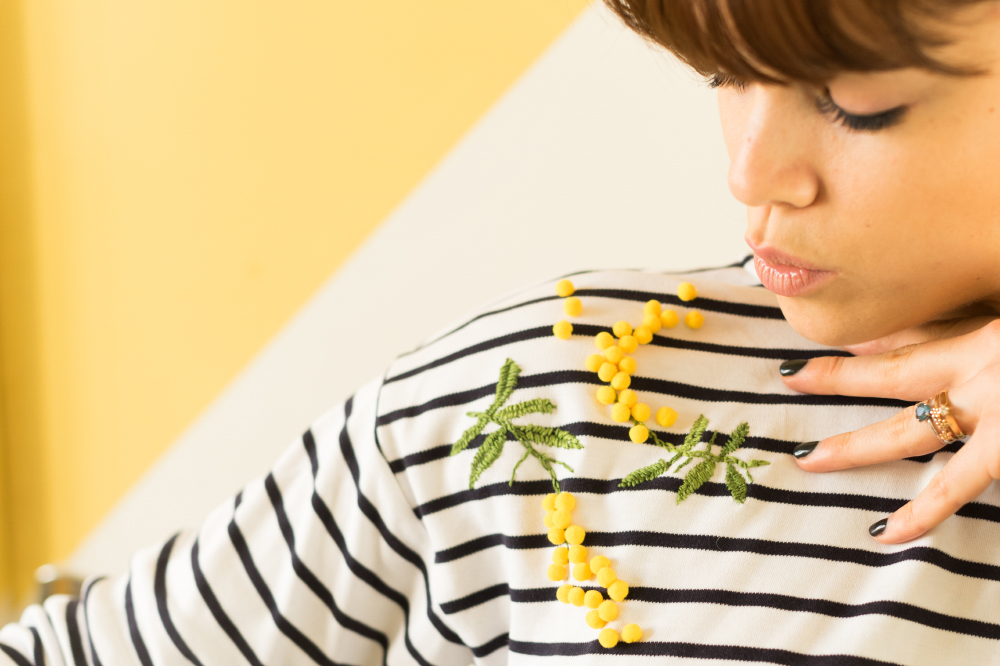
For this special week, here’s another DIY that I love and the studio adores since it’s really fast and easy to make. I think that I just might embroider mimosa all over this shirt’s collar! It’s official, after this theme week and our Bee My Baby collection, mimosas beat peonies and hortensias. They’re one of my favorite flowers! I can’t count the number of times I’ve bought mimosas over the past few weeks. I think I may be responsible for all 2017 sales... Anyways, aren’t they so delicate and fragile? Mimosas are round and fluffy usually for a few days, but in an overheated studio, they only last a few hours... So I need a long term solution to keep them bright and yellow.
Last year, Charlotte made us a beautiful paper cake for Make My Lemonade’s four year anniversary. She used little yellow scrapbooking pompoms for the daisies. I had also used them for the darling veil that Karuna and I taught you to make. Here’s a “slightly” sped up version of how to embroider mimosas on a sailor top!
As you can see, it’s really easy to make this. I’ll get into the details for those who’d like to start embroidering but have no idea where to start!
To start with, to embroider this DIY, you’ll need:
- An embroidery hoop
- A sailor top or any other shirt
- Green embroidery thread
- Yellow thread
- Mini childrens’ pompoms, ours come from Rougier & Plé
- A pen that erases with heat!
 Once all the leaves are finished, you can attach the mimosa stem using a double chain stitch. This stitch is very, very easy. Pull out the needle, twist the threat around your thumb (always in the same direction) and thread the needle through the exact same hole it came out of. Keep the loop around your thumb and pull the thread out a few millimeters away, thread the needle through the loop around your thumb, pull your thumb out, and voilà! Next, turn the thread around your thumb (still in the same direction) and thread the needle through the same exact same hole it came out of, etc... Quick tip: hold the hoop in the direction that you want to do the double chain stitch, it’ll make things a lot easier!

Next, using yellow thread, attach the little yellow mimosa pompoms by threading through their middles. Have fun! And TA-DA!
 Translated by Whitney Bolin[:]