My little cats!
Here is an easy DIY today, a little colorful tips to share with your children, brothers and sisters, nephews, neighbors… with any kids actually! I don’t know if you remember the
Petit Bateau workshops all around France but today I re-do the star DIY of this workshop before your astonished eyes. The kids were really into it and much more skillful than their moms, sorry ladies but you urgently should introduce your kids to sewing… It’s a DIY for children and for older children as well, I imagine doing these little windmills with leather would be great… To be continued. If you’re out of ideas for the rainy weekend to come, just go buy some baize and press studs at your local notions store and you know you’ll be able to keep your tribe busy for an afternoon. I tested this workshop quite a few times so I can tell you that the children should be at least 6 years old and know how to well use a pair of scissors to really have some fun, you’ll see they’ll be completely autonomous after a few windmills…
Length: allow 10 minutes for the first windmills
Difficulty: easy for an adult but it’s also a good way to initiate children to sewing, so they can fix your buttons and socks on wednesday afternoon.
For this DIY you will need:
- baize
- a pencil
- thread and needle
- scissors
- press studs
- a small ruler
- and a Marinière (stripped shirt)

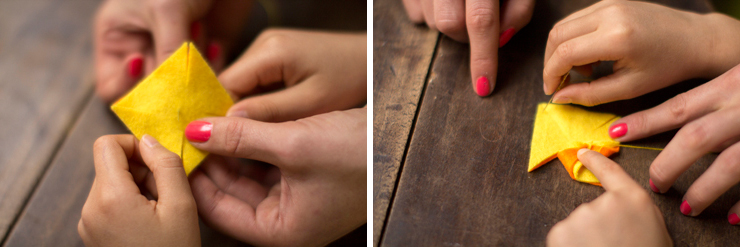
Draw squares on the baize with at least two different colors for each windmill (here the large windmill dimensions are 10x10 cm and the small ones are 5x5 cm). Small tips: cut your squares right on the lines to avoid inelegant pencil marks.
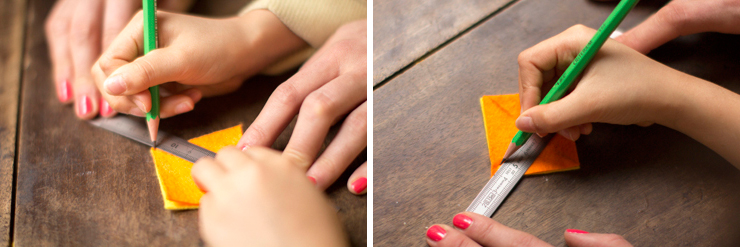
For the little ones (or the older ones who are not so sure) you can draw diagonals with your ruler to make the next steps easier, don’t draw them to the center but only draw the ends.
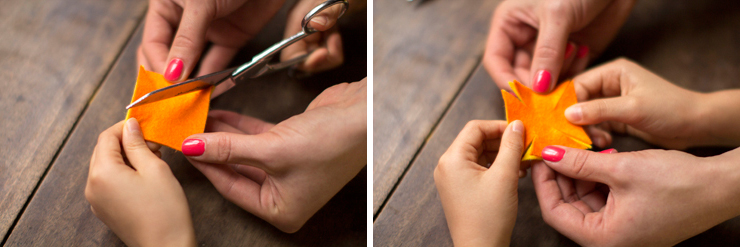
As earlier, cut on the lines to make the pencil marks disappear and stop à 1,5 cm from the center of the square.
Grab some thread matching your windmill and a needle, double your thread, make a knot and start sewing at the center of the windmill, letting the needle and thread come out of it on the other side.
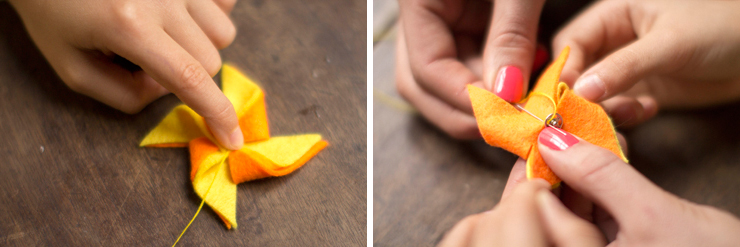
Fold every other angle towards the center of the square in order to create you windmill, either the right side or the left side of the angle but you need to keep the same side to make you windmill. Put every part on the needle and sew again at the center of the windmill. If this step in hard you can still sew every angle one by one. Add a few stitches to fix the lot well.
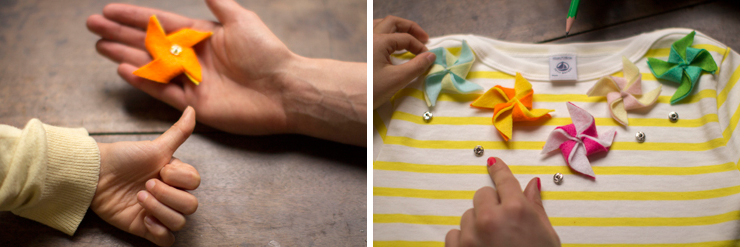
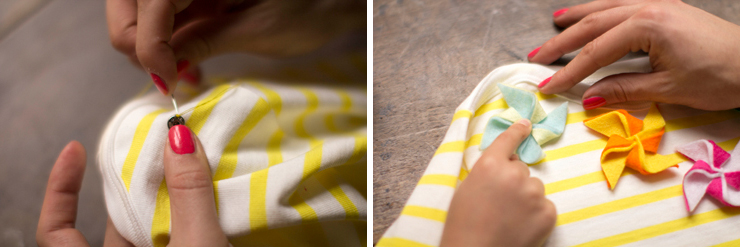
Once your last stitch is done, turn it on the back and be careful not to cut the thread ! Take the male part of the press stud and start sewing it with the same thread. Make two stitches for every press stud hole to fix it well. Here you are with your first windmill ready to decorate your
marinière.
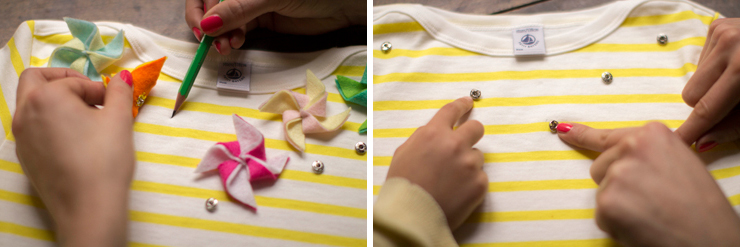
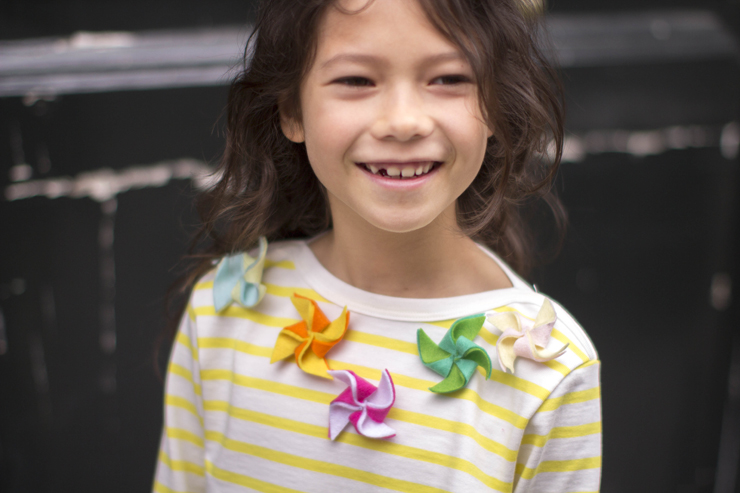
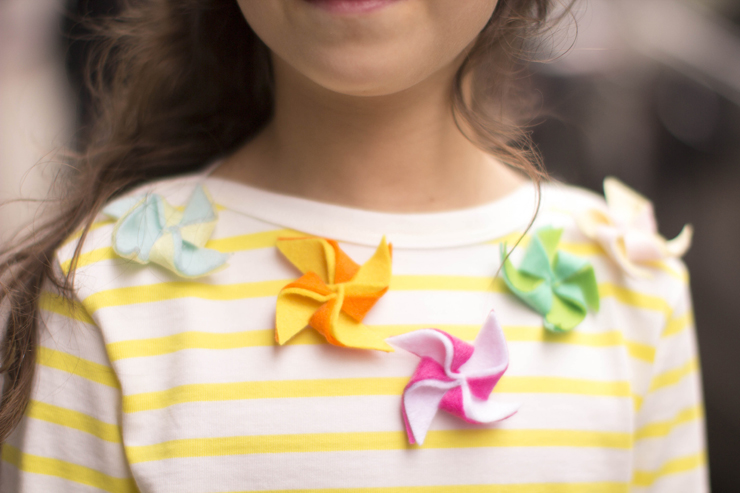
You can now decide the place of your windmills on your marinière. Draw a small dot with the pencil to mark the future place of the female part of the press stud.
Now take the female part of your press studs, your thread matching the color of the marinière this time and your needle. Fix the press studs at the chosen place, two stitches for every press stud hole. Clip your windmills and don’t hesitate to have fun choosing their location, either like a necklace or like a buttonhole or in a cluster on the chest, enjoy !
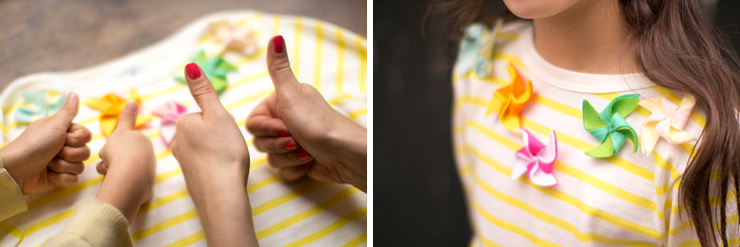
And TA-DA ! Don’t forget to unclip your windmills before washing the shirt !
[:]


